크롤링 방법
Selenium은 동적웹에서 크롤링을 하거나, 웹에서 액션(스크롤, 클릭)이 필요한 경우 사용됩니다!
프로그램 설치
1
2
(Together) C:\Users\wk647\Desktop\Project\Together> pip install selenium
(Together) C:\Users\wk647\Desktop\Project\Together> pip install bs4
가상환경을 만들고 Selenium과 BeautifulSoup 라이브러리를 설치합니다. Selenium을 사용하기 위해서는 WebDriver을 따로 설치해야합니다.
설치한 파일은 가상환경 내부에 src 파일을 만들고 해당 위치에 저장합니다.
아파트 검색하기
Selenium 실행
1
2
3
4
5
6
def start(url):
    driver = webdriver.Chrome("chromedriver.exe")
    driver.set_window_size(1920, 1080)
    driver.get(url)
    time.sleep(0.5)
    return driver
저는 이미지 데이터를 얻고 싶어서 selenium을 전체화면으로 실행시키는 함수를 만들었습니다.
이미지 데이터를 얻기 위해서는 캡쳐를 한 다음 pillow 라이브러리를 사용해서 이미지는 crop하는 작업을 실행해야 합니다. 그러기 위해서는 각자 컴퓨터에 맞는 해상도도로 selenium을 실행시켜야합니다.
1
2
url = "http://nland.kbstar.com/quics?page=B046948"
driver = start(url)
KB리브온에서 매물정보를 확인하는 페이지의 url로 바로 들어갑니다.
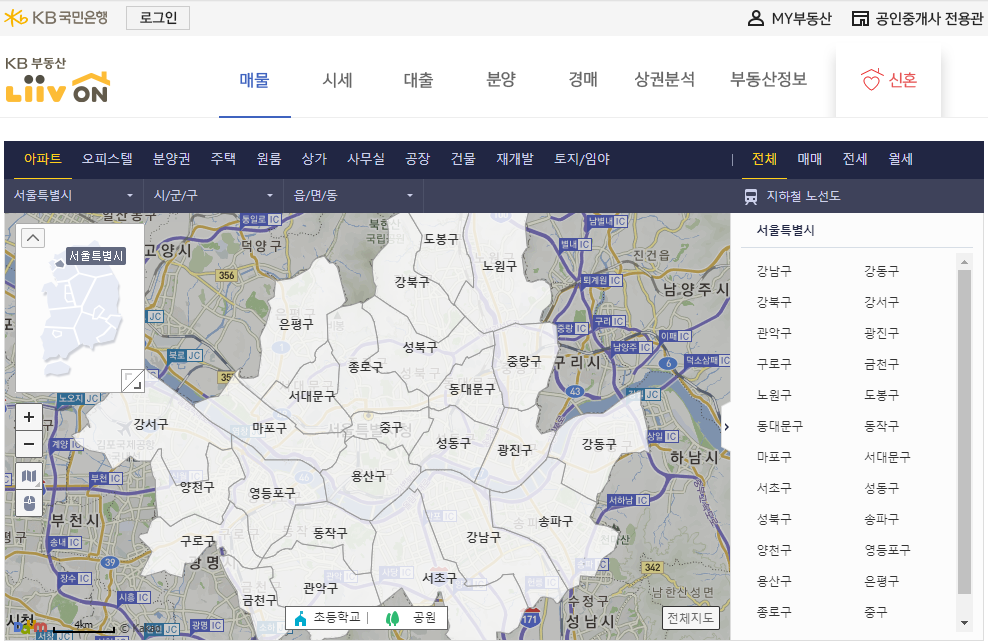
크롬창이 뜨면서 위와 같은 화면을 볼 수 있을 겁니다. 이제 주소별로 검색하는 함수를 구현해보겠습니다.
Input
1
2
3
address = input("상세주소를 입력해주세요")
# 상세주소를 입력해주세요 : 경기도 부천시 심곡본동 태경삼익
address_list = address.split(" ")
address로 상세주소를 입력받습니다. 입력받은 주소를 띄어쓰기로 나눠서 list로 나눠줍니다.
1
2
3
4
5
6
7
8
9
10
11
12
13
14
15
def search(_id, search_keyword, error_message):
    html = driver.page_source
    soup = BeautifulSoup(html, 'html.parser')
    _list = []
    # select 명령어로 li태그의 정보를 가져와 _list에 append 합니다.
    for li in soup.select("#"+_id+" li"):
        _list.append(li.text)
    print(search_keyword in _list)
    # _list에서 search_keyword 존재 여부를 확인하고  True일 경우 해당 인덱스를 클릭합니다.
    if (search_keyword in _list):
        index = _list.index(search_keyword)
        driver.find_element_by_xpath("//ul[@id='"+_id+"']/li["+str(index+1)+"]").click()
        time.sleep(0.5)
    else:
        print(error_message)
어떤 항목을 검색할지 확인하는 _id, 검색어에 해당하는 search_keyword 해당 함수가 오류가 날 경우 실행되는 에러메세지, 이렇게 3개의 인자를 포함하는 search 라는 함수를 만들었습니다.
1
2
3
4
5
6
7
8
9
_id_list = "sido", "siGunGu", "eupMyeonDong", "danji"
error_message_list = [   "시/도를 잘못 입력하셨습니다.",
                 "시/군/구를 잘못 입력하셨습니다.",
                 "읍/면/동을 잘못 입력하셨습니다.",
                 "단지를 잘못 입력하셨습니다."]
# 검색창을 한번 클릭해서 활성화 시킨 다음 search 함수를 실행합니다.
driver.find_element_by_xpath("//a[@title = '시/도 선택']").click()
for i in range(4):
    search(_id_list[i], search_list[i], error_message_list[i])
_id, error_message를 시/도, 시/군/구, 읍/면/동, 단지 에 따라 각각의 값을 list에 넣어줍니다. 그다음 For문을 통해 serach 함수를 실행시킵니다.
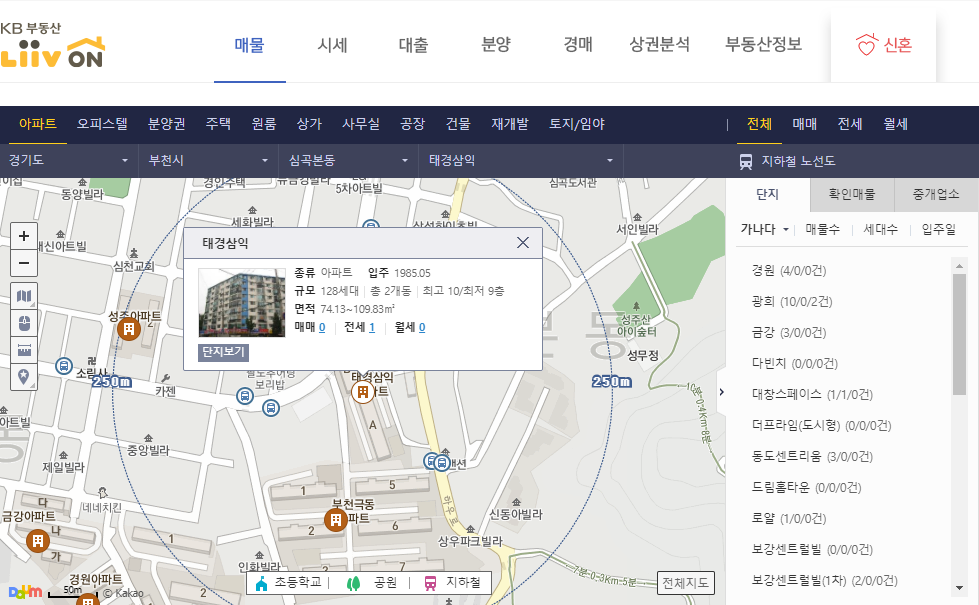
이제 검색결과에서 필요한 정보를 캡쳐해보도록 하겠습니다.
시세 캡쳐하기
시세 탭 클릭
1
driver.find_element_by_xpath('//div[@class="tab_type"]/ul/li[2]').click()
위 명령어는 탭 형태로 디자인된 div태그에서 2번째 li태그를 클릭한 것이다.
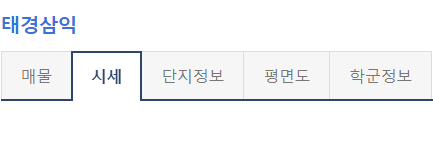
2번째 탭에 위치한 시세를 클릭하기 위해 index를 사용한 것이다.
평수 선택

시세변동 추이 그래프 부분에 평수를 선택할 수 있게 되어있습니다. 정확한 데이터 수집을 위해 평수 선택을 하고 캡쳐를 하도록 하겠습니다.
1
2
3
4
5
6
7
8
9
10
11
def select_space(space):
    html = driver.page_source
    soup = BeautifulSoup(html, 'html.parser')
    option_list = soup.select("option")
    # find 값이 -1 이아니면 해당 인덱스를 프린트
    for index, option_ele in enumerate(option_list):
        option = option_ele.text
        print(option)
        if option.find(space)!=-1:
            print(index)
            driver.find_element_by_xpath('//option[@value="'+str(index+1)+'"]').click()
select_space 함수는 평수를 입력받아 html소스에서 option에 있는 값들과 비교 후 인덱스를 이용해 해당 태그를 클릭하는 방식으로 구현되었습니다.
if option.find(space)!=-1:find 값이 -1이라는 소리는 option에서 space에 해당하는 값을 찾지 못했다는 것을 의미합니다.
1
2
3
space = input("평수를 입력해주세요")
# 평수를 입력해주세요 : 105
select_space(space)
소수점까지 적지않아도 find 명령어가 스스로 찾아서 해당 인덱스를 가져와서 클릭합니다.
다만 중복될 경우 에러가 발생할 수 있습니다.
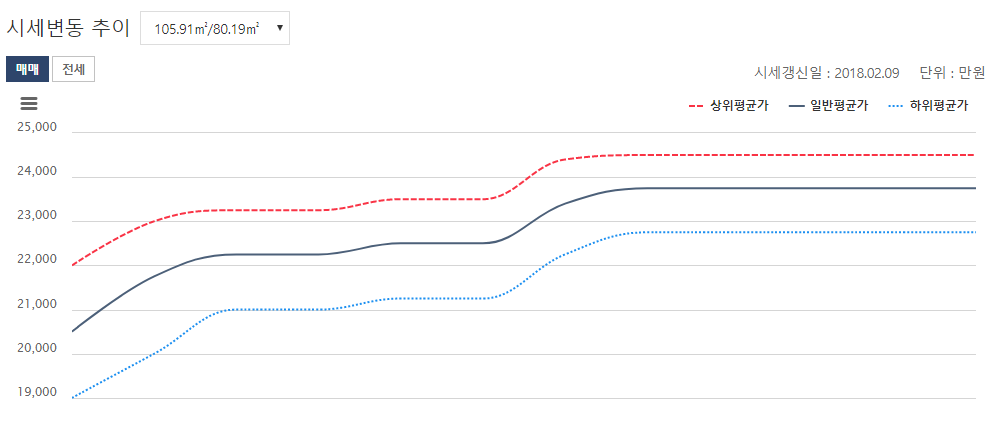
이제 캡쳐를 해보도록 하겠습니다.
캡쳐
1
2
3
4
# 맨 아래로 이동
element = driver.find_element_by_class_name("chat")
actions = ActionChains(driver)
actions.move_to_element(element).perform()
캡쳐를 하기 위해서는 해당 element로 스크롤을 이동해야합니다. 이동하기 전에 스크롤을 맨아래로 내려줍니다.
이건 개인적인 노하우 인데, actions 명령어가 아래서 위로 올려가며 해당 element를 찾기 때문에 맨아래로 내려서 스크롤 이동을 하게 되면 캡쳐 후 crop이 용이합니다.
1
2
3
4
5
6
7
8
9
10
11
12
13
14
15
16
17
18
19
# 시세 div으로 스크롤 이동
element = driver.find_element_by_class_name("tbl_col")
actions = ActionChains(driver)
actions.move_to_element(element).perform()

location = element.location
size = element.size
# 전체화면을 캡쳐 후 output 폴더에 저장합니다.
driver.save_screenshot('output/screenshot.png')
# 저장된 이미지를 다시 불러온다음
im = Image.open('output/screenshot.png')
# 상,하,좌,우 값을 사전에 detect한 태그의 크기로 정해줍니다.
left = location['x']
top = 0
right = location['x'] + size['width']
bottom = location['y']
# 이미지 crop!
im = im.crop((left, top, right, bottom))
im.save('output/시세정보.png')
이렇게 하게 되면 output 폴더에 이미지가 생성됩니다!
Result
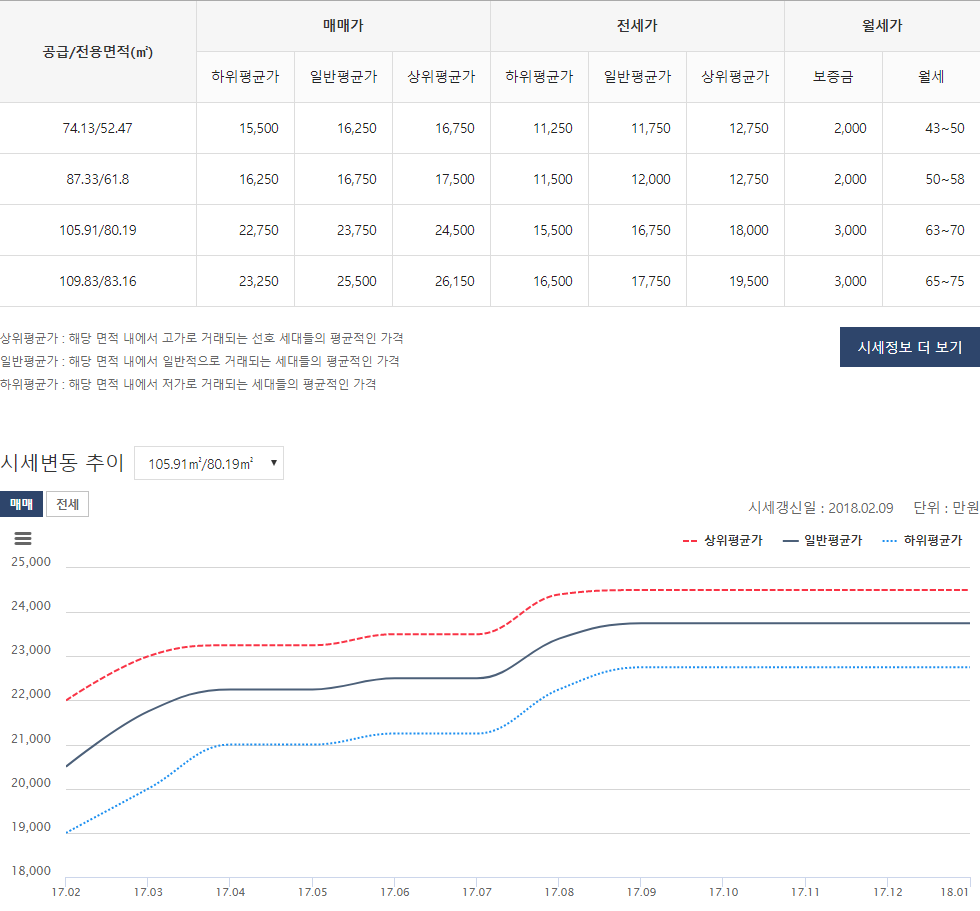
시세관련 테이블과 그래프를 corp한 결과입니다.