이전 내용
- [ionic 3 앱 디자인 (여행플랜) 포스팅]
- [ionic 3 앱 개발 (사이드메뉴&탭 결합) 포스팅]
- [ionic 3 앱 개발 (탭 아이콘 변경) 포스팅]
- [ionic 3 앱 개발 (검색바 애니메이션) 포스팅]
- [ionic 3 앱 개발 (다양한 애니메이션) 포스팅]
- [ionic 3 앱 개발 (드롭다운) 포스팅]
- [Github 전체 소스코드]

이제 내용을 채워보도록 하겠습니다.
슬라이드

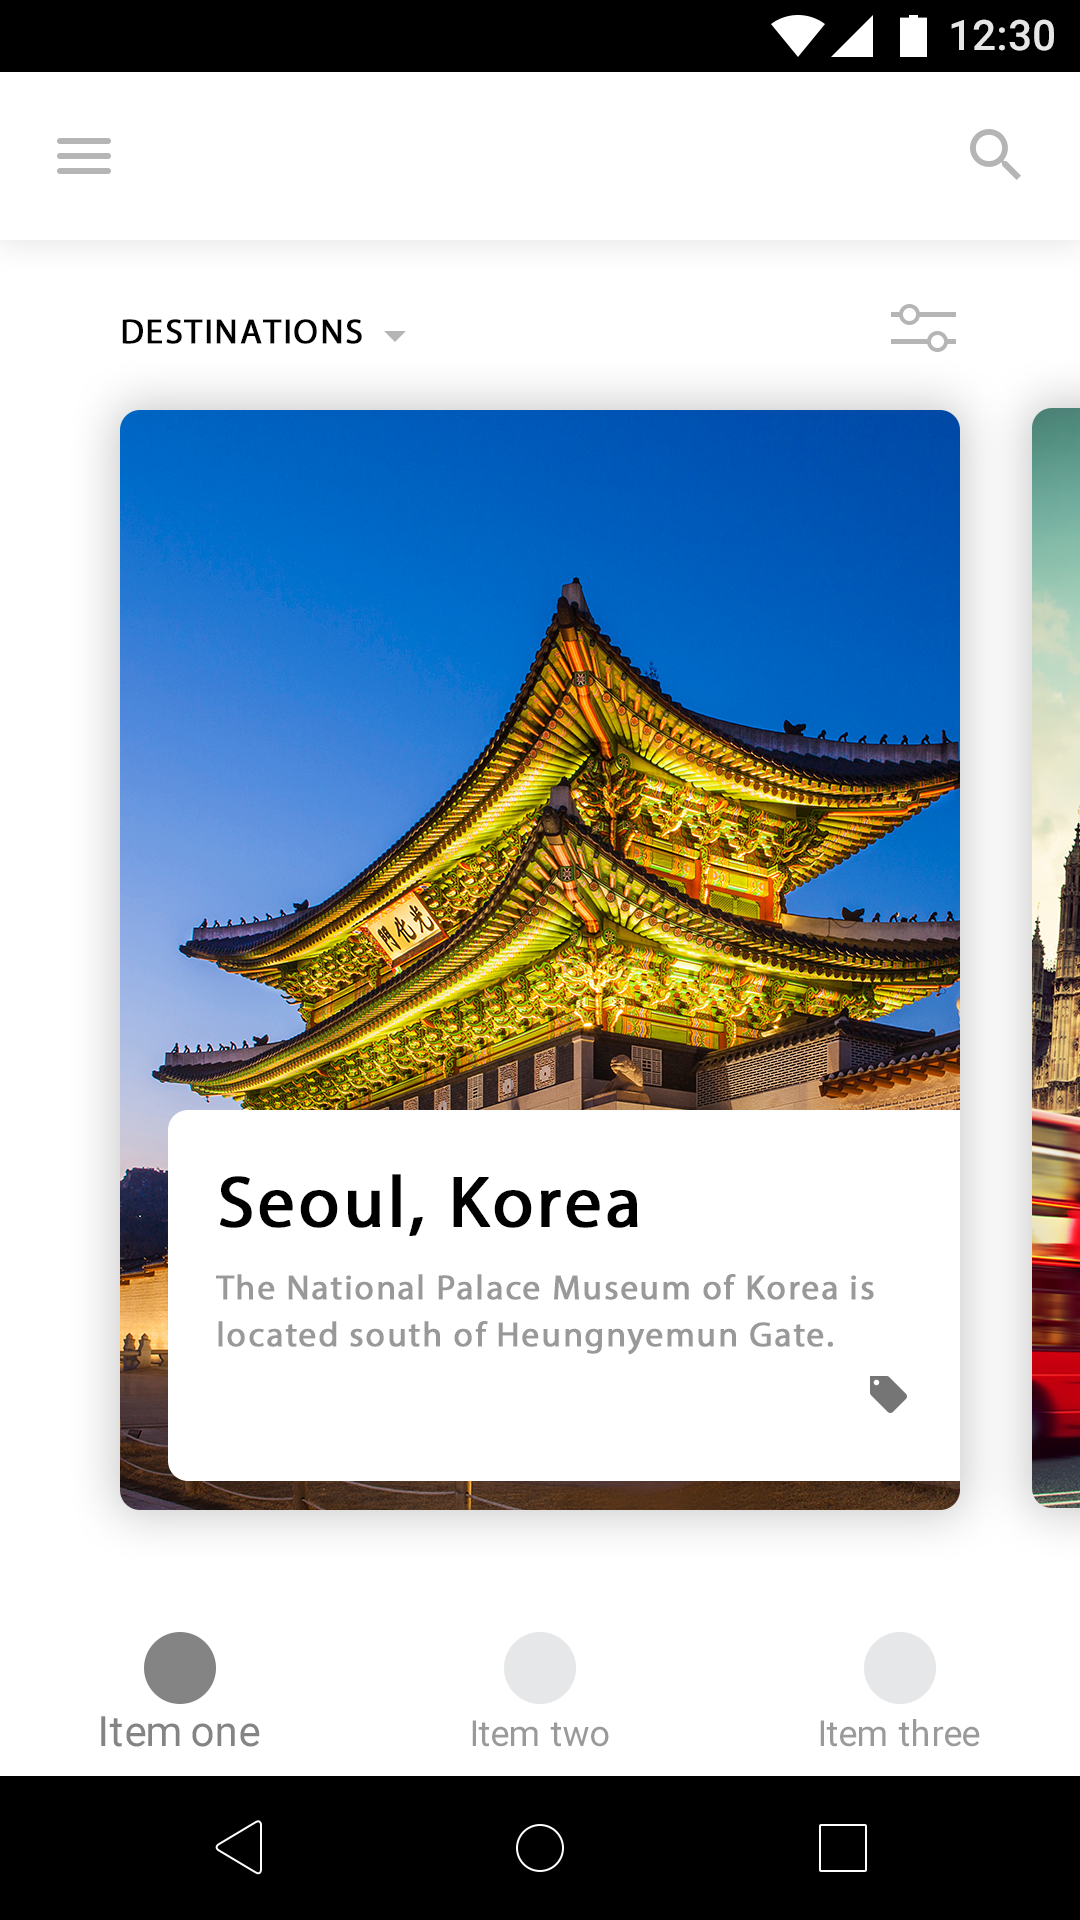
가운데 이미지와, 타이틀, 서브타이틀, 태그 버튼을 구현해 보도록하겠습니다.
itemone/itemone.html
1
2
3
4
5
6
7
8
9
10
11
12
13
14
15
<ion-content padding>
    <ion-slides>
      <ion-slide class="slide-background">
        <img class="slide-img" src="assets/icon/producr-img.png">
        <div class="slide-card">
          <h2 class="slide-title">Seoul, Korea</h2>
          <p class="slide-subtitle">The National Palace Museum of Korea is
          located south of Heungnyemun Gate.</p>
          <button class="tag-icon">
              <ion-icon name="tag-icon"></ion-icon>
          </button>
        </div>
      </ion-slide>
    </ion-slides>
</ion-content>
슬라이드를 사용하는 방법은 아주 간단합니다. <ion-slides> 태그 안에 <ion-slide> 갯수에 따라 보여지는 슬라이드의 수를 조절할 수 있습니다.
데이터를 리스트로 가져와서 ngFor를 이용해서 만들면 쉽게 만들 수 있겠쬬!?!
itemone/itemone.css
1
2
3
4
5
6
7
8
9
10
11
12
13
14
15
16
17
18
19
20
21
22
23
24
25
26
27
28
29
30
31
32
33
34
35
36
...
.slide-img{
    width: 300px;
    box-shadow: 0.1px 0.1px 60px #999;
    border-radius: 10px;
}
.scroll-content{
    padding:0 !important;
}
.slide-card{
    position: absolute;
    bottom: 65px;
    background: #FFF;
    padding: 10px;
    width: 286px;
    left: 70px;
    border-radius: 10px 0px 0px 10px;
}
.slide-title{
    text-align: left;
    margin: 8px 8px 8px 8px !important;
}
.slide-subtitle{
    margin: 8px 8px 30px 8px;
    font-size: 14px;
    text-align: left;
    color: #999;
}
.tag-icon{
    background: #FFF0;
    font-size: 50px;
    position: absolute;
    top: 70px;
    left: 220px;
    color: #777777;
}
저는 슬라이드에 대한 CSS를 이렇게 적용해봤습니다. 여러분들도 각자 취향에 맞춰서..해보시면 좋을 것 같습니다! CSS는 개취
Result

드디어 프런트 완성입니다. 이제 백엔드를..해볼까요?크..